“Creativity is always an option.” Or at least that’s what some of my friends claim when a problem is mentioned. Often exasperating, but, (it kills me to admit this), there is some truth to it.
Months ago I realized we had a problem at Church; the kids
have nowhere to put the name-tags we created. After several weeks of chaos, a
wonderful volunteer brilliantly created an alphabetized system which has worked
very well.
 Before this system, my Lumber Yard crew helped me figure
out the details for a name-tag-tree. Due to life, (company was coming and we
had to get the lumber and drill out of the middle of the room so the children
wouldn’t kill themselves or something) and the fact it was no longer became
necessary, the project came to a grinding halt and has sat waiting in the
office. Until this week.
The events leading up
to this phenomenon of me completing a project were; a) I had a lot of time on
my hands; b) I was looking for things to do; c) I was actually making myself do
those things; d) I think our table housing our current system is going to be
relocated or removed soon, (pure speculation)); e) I’m lazy, and have decided the
kids can start putting their own name tags away; and f) I wanted the lumber out
of the office.
Ok, so b, and d, were the main reasons, but the rest did
play a part. I learned many things
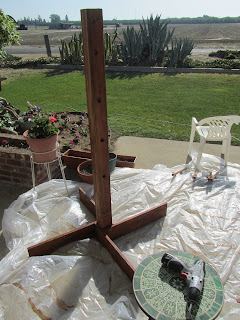
constructing the name-tag-tree. It was a project of firsts. First time I’d
drilled 1” holes through anything, first time I’d successfully used a little
hand sander, even the first time I’ve used stain.
 I decided to set up shop out on our front porch. I started
off to the side, but sprinkler + wind caused me to beat a hasty retreat and I
ended my project directly in front of the door.
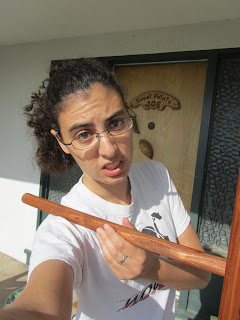
Like I said, I learned a lot, for starters, it takes forever to drill a one inch hole through
a 4x4. You have to put some weight on the drill, or it doesn’t go anywhere. Your
hand, or at least my hand, get’s cramped and exhausted. That was step two.
Step one was actually figuring out what I was going to need
and getting all the necessary parts. That’s where Hilmar Lumber comes in. The
guys in the yard took time to a) understand what I was trying to do; and b)
kindly inform this ignorant savage of a better way to do things, that would
actually work. They also cut all the
wood for me which was great, ‘cause I can’t wood straight at all. I manage to
mess up with guides. (Don’t ask, I don’t know).
 The rest of the brainstorming came from various tidbits my (at
the time) ACE coworkers had shared with me.
Step three was sanding everything down. After step one,
sanding was pretty much cake with an abundance of frosting. I do wish I had
realized before I stained everything, that the direction I was attempting to
sweep the saw dust off the porch was merely giving the wind fuel for flight. If you notice little bits of sawdust stuck to
the tree, well, now you know why.
Then came step #4, staining. I’d always heard staining is
harder than painting, but I love the grain of wood, (plus I thought I’d get in
less trouble at church if my “creation” wasn’t painted neon green or something.),
and I thought, how bad can it really
be, I can paint boards ok. HA!
My goodness, was I ignorant. To start with stain is much
thinner and stickier than paint. Because of this it runs down the sides a LOT! easier
leaving dark gummed up streaks. It’s made to show the wood grain, which means,
any markings you didn’t sand off before staining also show up. (Yes I learned
the hard way, just pretend those red marks don’t exist). Finally stain has to
be remixed if you’re using it for a prolonged period of time. Otherwise some parts
will have, in this case, tiny red streaks.
 Step five, drilling the stabilizing boards to the post. Once
I figured out how to brace the boards and tighten the drill down all the way on
the bit, this went fairly smoothly. Not all the boards are perfectly attached.
But together they create a fairly sturdy base.
 Step six, putting the dowels through the holes. Just because
you drill a 1” hole does not mean a 1” dowel will slide right in. In fact, none
of them did. I had to take a rubber mallet and pound them through. Bright side
they won’t be sliding off any time soon. Down side, it messed up the stain.
Since I’m on the subject of dowels, a small rant, can anyone
give me a good reason why the bar code stickers stick to them so well? I had to
sand those stupid things off, which left gunk on the sand paper, and then use packaging tape to get the last of the
residue. It was ridiculous!
Step seven, touching up the stain, particularly on the now
chewed up dowels. I learned from Dad, that a cloth rather than a paint brush
might be the way to go. I decided to try it for the touch up, he’s right; I
like it a lot more. Drawback, I stain my fingers. I got it off with the mineral
spirits, but I’m not sure that’s good to use on skin...
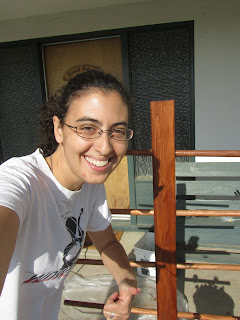
I dragged this out of hiding Thursday morning. By 9 am
Saturday, I’d finished it. I seriously put the final touches on while still in
my pajamas. (And may I just add, I am astounded,
I did not get stain on my white t-shirt).
Ok, so it’s not the greatest piece of construction; I didn’t
even drill the holes straight. But dang it, I’m proud of it. I thought it through and for the first, and
possibly only, time created something decent out of wood. And I finished it! To
date my carpenter endeavors have included a poorly constructed box (that was
the idea, for the record), and an A-frame, that only worked because someone
else cut the middle piece of wood for me.
So thank you Hilmar Lumber crew, friends who egg on the
creativity and you brother for ignoring my whining and assuming I would be successful,
‘cause “what idiot could mess this up?!?”
Oh and for the record the brown spots on my skin are not unnoticed
moles, or random places where I’m suddenly darker, and they are most definitely
up NOT chocolate spots. I do bathe thank you very much. They’re remnants of my er,
encounter with stain.
(Enough pictures for you Leila? And Em this counts!)


I really like all the pictures. Yes, it's enough :-)
ReplyDeleteMy favorite is the 2nd one, fresh after drilling a hole.
Awesome project! It's cool to have made something solid like this. From here, who knows what you could do! I still don't think I'll commission you to make my bed loft just yet :-P
Also, great quote!
ReplyDeleteHa ha. If you notice I didn't volunteer. Yeah, you would say that about the quote.
ReplyDelete